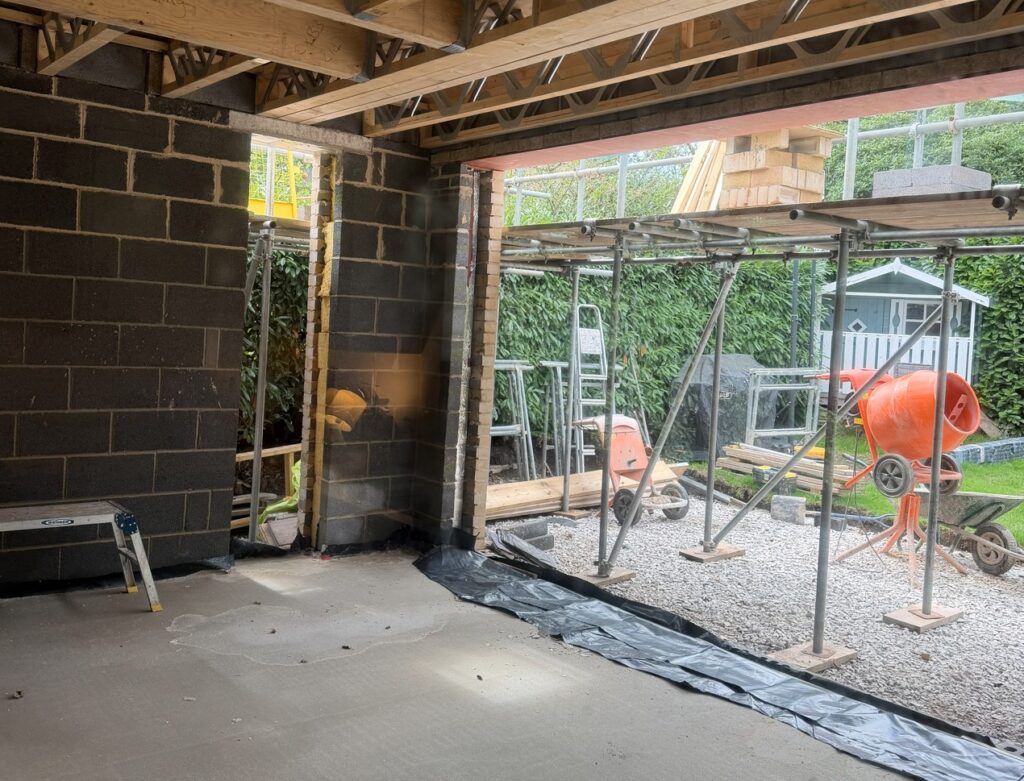
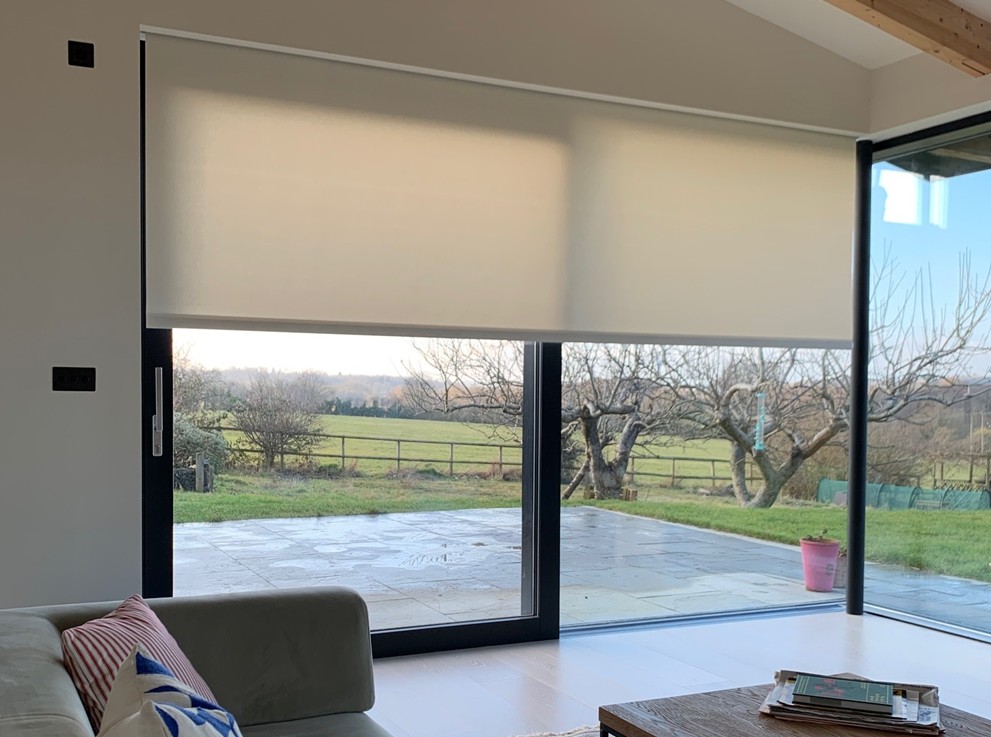
Modern homes rely on large sliding and bi-fold doors to create open, minimal spaces. As glazing increases, the need for controlled daylight and privacy increases with it. Architects and homeowners want shading that supports clean architecture, so concealed blinds have become a preferred solution at design stage. This approach preserves uninterrupted sight lines on slim framework door systems, while delivering comfort through the S.H.A.D.E principles. Blindspace enables the blind hardware to remain completely hidden until the fabric is needed and is considered the gold standard of blind concealment.
What Blindspace Is and How It Works
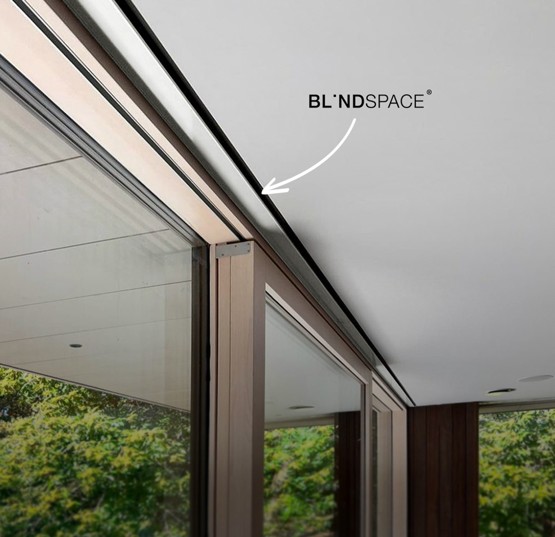
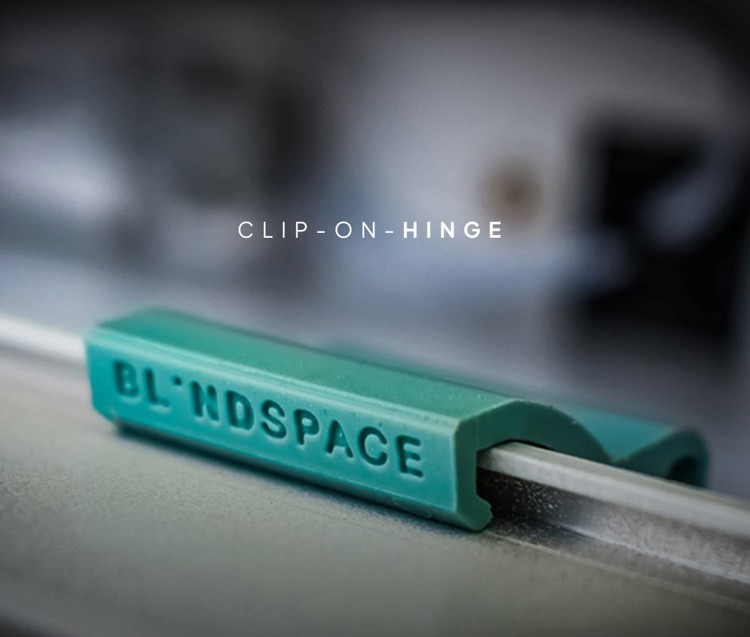
Blindspace is a concealment system designed to hide blinds within the fabric of a home. The key element is creating the allocated space for the boxes during first fix so the system integrates cleanly with the build. It is a building product that relies on joiners, electricians and plasterers working together to prepare the void, position cables and achieve its seamless finish. The patented hinged cover is the brilliance behind Blindspace. It allows the blinds to be installed later in the project and future servicing without damaging the completed interior.
Box Position Strategy: Ceiling or Wall Mounted
The position of the Blindspace box depends on the relationship between the door height, the ceiling line and any structural steel above the opening.
Ceiling Mounted Blindspace Boxes
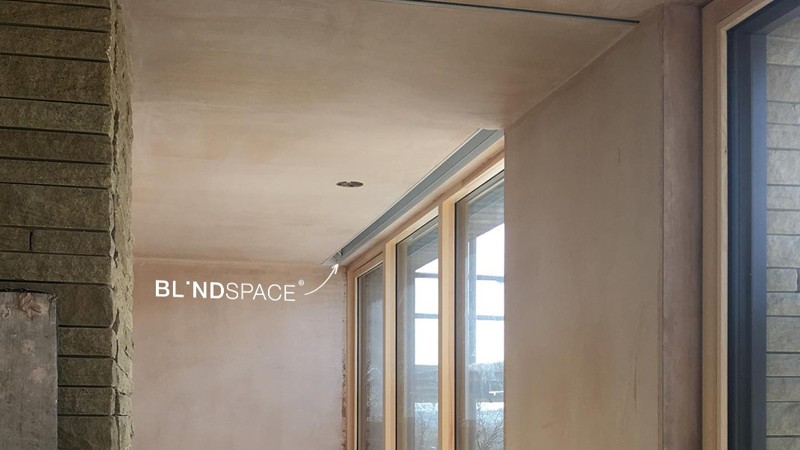
When the doors run close to the ceiling, you mount the box in the ceiling line so the blind drops cleanly and the ceiling reads as one continuous surface. This works when the steel sits higher and does not interfere with the recess.
Wall Mounted Blindspace Boxes
If a steel sits directly above the doors, there is no room to build the void beneath it. The box cannot pass through the steel. In this situation, the Blindspace box is wall mounted by building a bulkhead that brings the wall forward to meet the top of the doors. This creates the space needed for the Blindspace box while keeping clear of the steel structure.
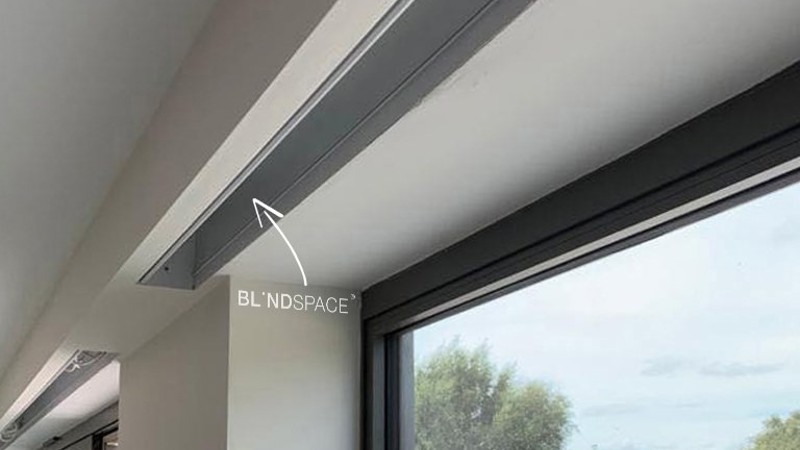
Framing the Void
Whether the Blindspace box is ceiling mounted or wall mounted, you must create a precise void that allows for the correct internal depth whilst staying parallel to the glazing. Joiners will frame the void using timber, and the front edge becomes the plaster datum that defines the final line.
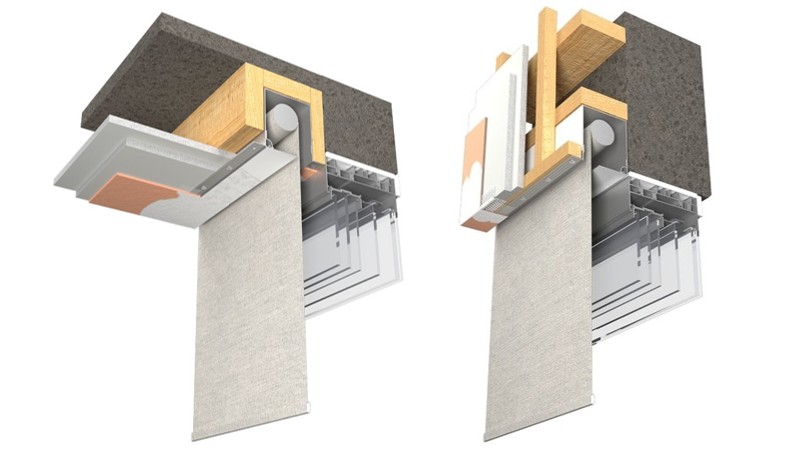
The frame must allow for at least 18 mm plywood across the full width so the Blindspace box and blind brackets have solid fixing points. Dual blinds in stacked Blindspace systems also need side plywood to support the second blind. This boarding is essential, and the designed space must account for it from the start.
Design the void with care because the Blindspace box relies on precise geometry. Most installations need a cavity depth that is 25 mm deeper than the Blindspace box itself. This depth creates space for the box, the skim flange and the plywood surround.
The void must remain non load bearing so the surrounding structure carries all building weight. Keep a 2 mm tolerance on every axis so the box sits level, straight and parallel with the finished plaster line. Good void design prevents clashes with framing and cables and supports a clean architectural finish.
Blind Format Design
Blind format describes how many blinds are used across your door opening. The blinds must complement the doors framework. When you use multiple blinds, the back to back brackets create fabric gaps of up to 50 mm. These gaps must align with the door mullions so the blinds read as part of the door design. Multiple blinds can be preferable because they allow you to control each blind independently or simultaneously, which can help manage daylight more precisely.
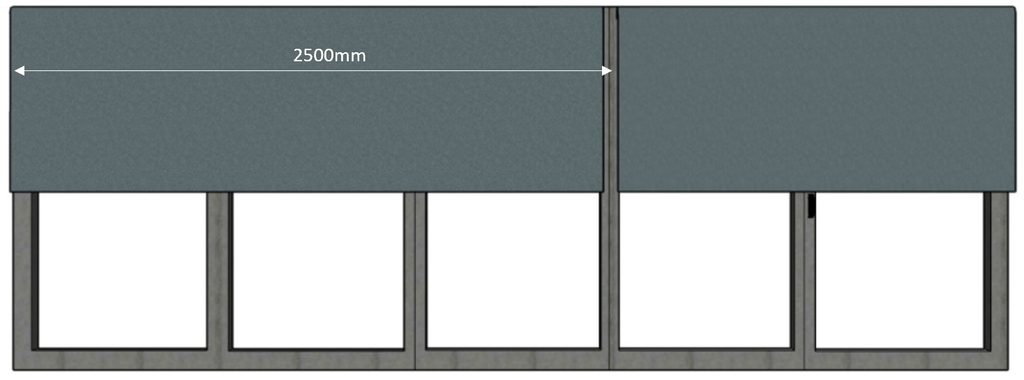
As door widths increase, blinds traditionally needed larger tubes to avoid deflection and the V effect created on fabrics. Larger tubes require larger concealment boxes, which increases the space needed in the ceiling or bulkhead. Homeowners and architects can now turn to ZoomTech Deflect Zero for wider blinds on narrower tubes without the undesirable deflection. This keeps Blindspace boxes smaller and reduces fabric gaps across the opening. It gives a level of choice that once seemed impossible without using commercially sized hardware.
Electrical Planning and Cable Entry Positioning
As standard, electricians use 3‑core flex for blinds with built‑in receivers and wireless control. 5‑core flex is used when the blind connects to a hard‑wired switch or a home automation system such as KNX or Crestron.
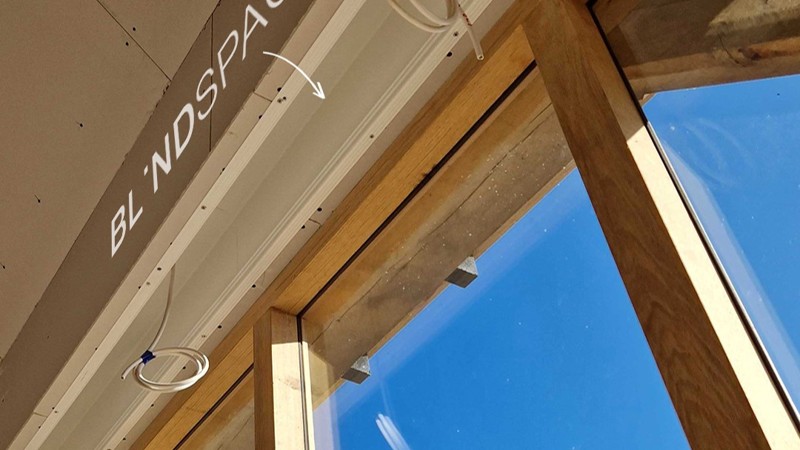
Each blind ideally needs its own flex cable. The cable must enter the Blindspace box 100 mm from the blind end on the hinge side and 20 mm from the edge. This is the opposite side to the fabric gap. Positioning the cable here keeps it clear of the fabric path and prevents interference as the blind drops. Electricians set the flex during first fix so it lands inside the recess at the correct height and depth, ready for the motor connection once the box is installed.
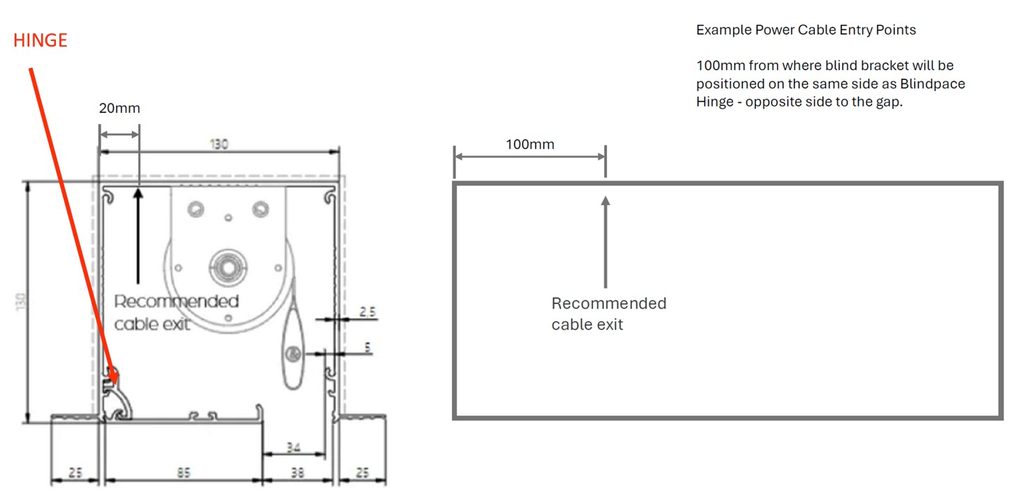
Once you install the Blindspace box, you can place the hinged cover on either side.
However, you need to make this decision during the planning stage so the power cables enter the box in the correct position and avoid the fabric gap. Careful design keeps every trade aligned and supports a clean final result. The hinge location controls where the cables drop and determines which side of the Blindspace Box the blind appears. The blind will sit closer to the glass on one side and further away on the other so plan the hinge location early to ensure intended results.
Electrical Protection and Load Guidance
Use a 5A fuse to supply a blind circuit of up to three Somfy Sonesse 40 RTS blind motors.
Wiring practice:
- Individual terminations: Bring each motor cable back to a fuse box rather than looping from motor to motor.
- Load management: Group motors logically by opening (sliding or bi‑fold set) to simplify fault‑finding and future maintenance.
- Location coordination: Align the power feed and cable entry with the blind bracket position on the hinge side, avoiding the visible fabric gap and keeping cables concealed within the door reveal or Blindspace pocket.
Keeping Cables Tidy Inside the Blindspace Box
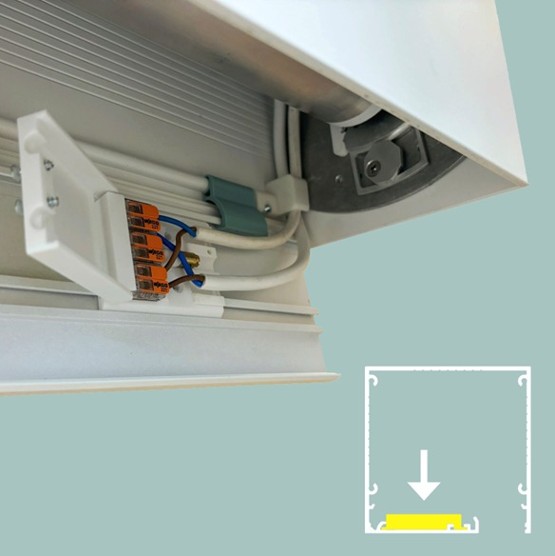
Keep the motor cable and power cable tidy when you have limited space inside a Blindspace box. Drop both cables from the hinge side of the box and place a junction box inside the Blindspace cover so the cables stay organised and easy to access. Radio blinds rely on the motor cable as an antenna, so keep the motor cable at least 300 mm long to maintain reliable signal performance. Short cables reduce range and create control issues. Good cable management keeps the installation clean and supports long term reliability.
Choosing the Correct Blindspace Box Size
Blind installers always prefer more space because it makes fitting and alignment easier. Most homeowners have limited ceiling or bulkhead depth, so the S100 x 100 often becomes the preferred option. It stays compact, stays discreet and fits into tight architectural conditions.
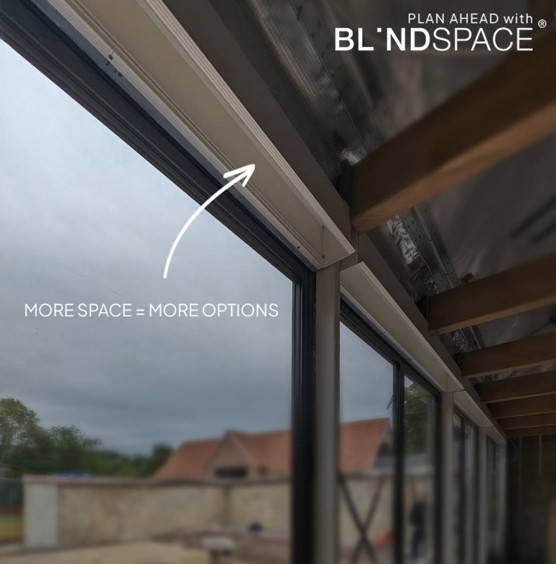
Box selection depends on more than available space. Several technical factors influence whether an S100, S130 or C110 x 170 is suitable.
- Tube size changes with blind width and deflection. Wider blinds need larger tubes unless you use ZoomTech Deflect Zero, which allows wider blinds to sit comfortably inside smaller boxes.
- Fabric thickness affects the final roll diameter.
- Drop length from the box to the floor increases roll size when combined with thicker fabrics.
- Hem bar depth and weight also influence tube size because heavier architectural hem bars may require larger tubes.
These variables compound quickly. The S130 x 130 gives you a safer margin when you have the space. If you plan a dual system with screen and blackout fabrics, the C110 x 170 is the correct choice because it provides the right stacked geometry and bracket spacing.
Speak to a specialist early in the design process. They calculate the correct box size and prevent costly mistakes. WindowTreat is here to help.in the design process and prevent costly mistakes.
Worse case scenario is your intended blinds do not fit inside the fitted Blindspace Box.
WindowTreat is here to help.
Skim Flange Options
Blindspace boxes use a 25mm skim flange on both sides of the front edge This flange gives the plasterer a clean surface to tape and skim so the cover finishes flush with the surrounding plaster. You can specify one flange or two. This choice depends on the available space and whether you need to push one side of the Blindspace box tight against timber without losing 25 mm on that side.
- The NS version provides a single flange
- The SS version provides two flanges.
You make this decision during design so the box fits the structure correctly. The flange sets the plaster datum. The plasterer tapes over it and brings the skim coat level with the hinge cover to create a clean architectural finish.
Corner Glazing: Mitred vs Butted Blindspace Boxes
Approach corner glazing with careful planning as blinds can behave differently when they meet at ninety degrees.
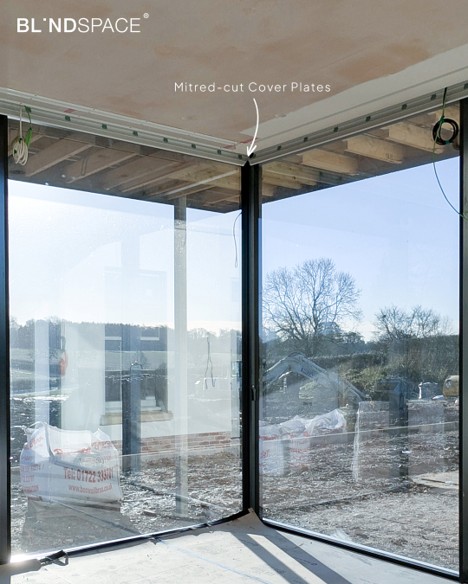
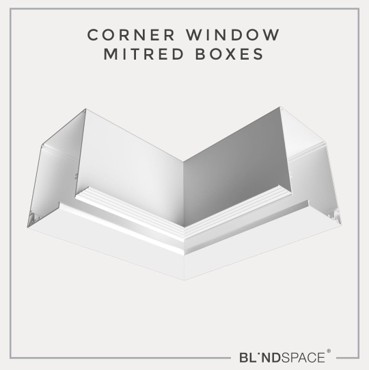
Corner with Mitre Joined Blindspace Boxes
A mitred corner creates a continuous architectural line. Electric blinds are often reverse rolled so the fabric falls on the room side. This reduces the risk of hitting door handles and, in corner situations, can reduce the visible gap where the two blinds meet.
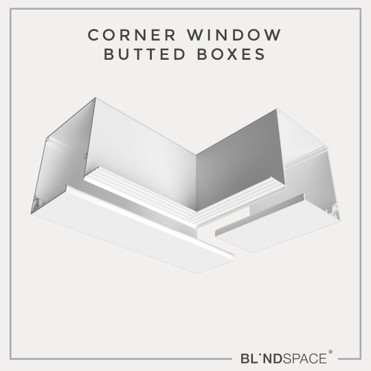
Corner with Butt Joined Blindspace Boxes
The butt join approach offers another solution. One blind travels slightly further to close down the corner gap. This again reduces the visible light line.
Design drives every decision. Plan the corner geometry early, choose the correct box format and confirm how each blind will sit relative to the glass. Good design prevents clashes, reduces gaps and delivers a cleaner architectural finish.
Continuous Elevations and Maximum Blindspace Lengths
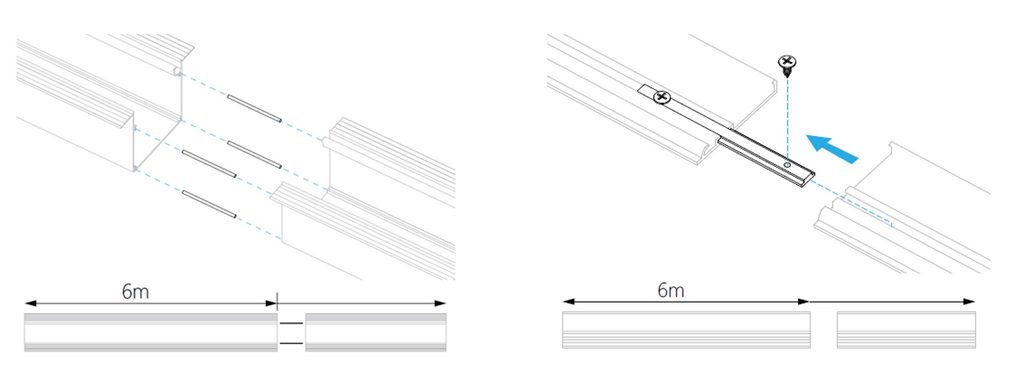
Blindspace boxes can span very long elevations, which is essential for wide sliding or bifold doors. The Blindspace box length relates to the full elevation, not the width of each individual blind being concealed. Standard profiles run up to six metres, but they are often cut down for transportation and then joined on site. Multiple boxes connect using splice pins for the box bodies and splice plates for the cover lids, creating one continuous recess across the entire run.
Coordinating Trades for Large Blindspace Installations
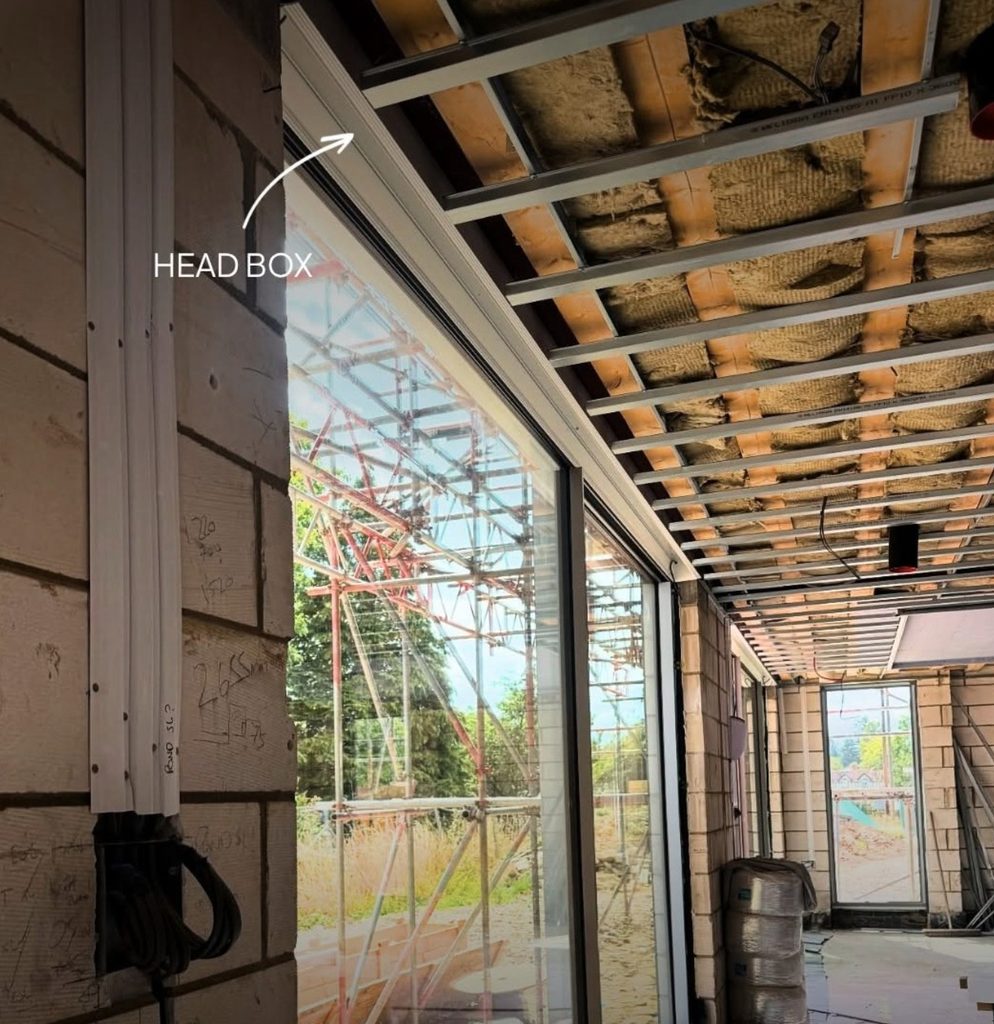
Large Blindspace sections need coordinated handling because several trades contribute to the final result. Joiners create the void structure and ensure the geometry stays true. Electricians route the power flexes to the correct positions so each blind receives a clean cable entry.
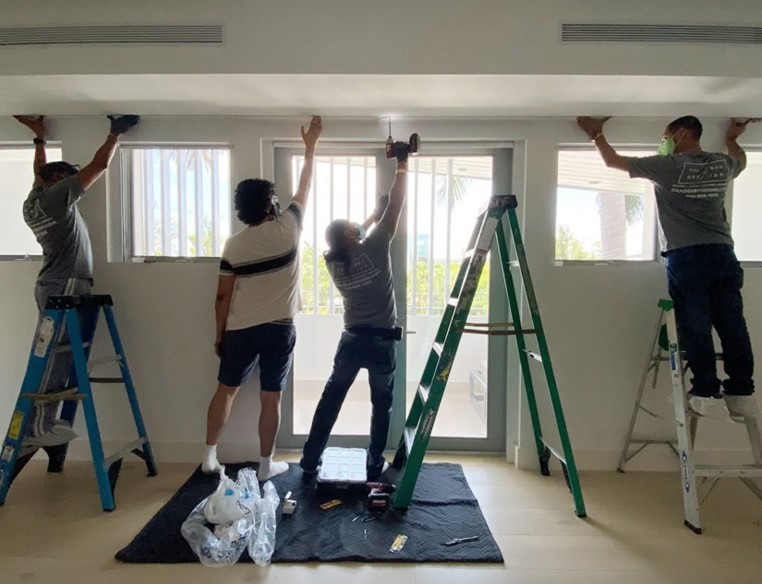
Builders lift, align and secure each Blindspace length as a team, following the fixing points spaced every 200 mm.
Plasterers then tape and skim the flange to deliver the final concealed finish. This multi‑disciplined approach ensures the homeowner receives a straight, stable and perfectly integrated Blindspace system.
Installing Blindspace Concealed Boxes
Costing Example: Blindspace for a Four‑Door Bifold
Homeowners often approach us at the stage where their bifold doors are already ordered and they begin thinking about window treatments. They want night‑time privacy but do not want to cover the slim‑line framework with a visible blind. This is exactly where Blindspace becomes the correct architectural solution.
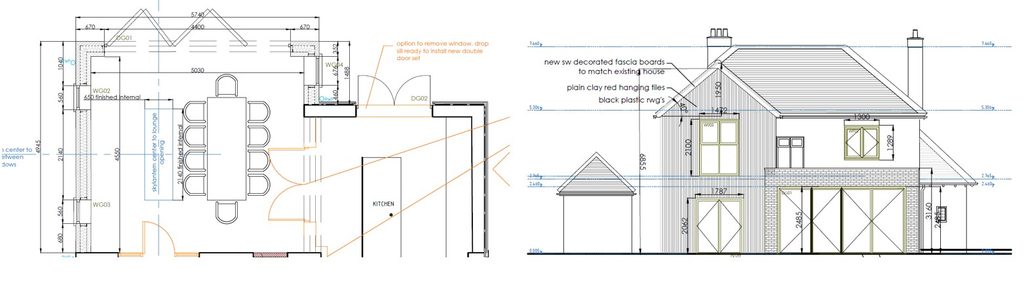
For this example, the bifold recess is 4470 mm wide and 2485 mm high. The decision is whether the project can accommodate an S100, an S130, or the C110 × 170 dual‑height box for dual electric blinds.
Standard boxes are distributed from a UK hub because they are the most commonly used profiles. Custom boxes are prepared and shipped from Sweden, which adds freight and packaging costs.
Blindspace Delivered Costs
| Blindspace Profile Type | £ Supplied Costs @ 4500mm including delivery & VAT |
| Standard S100 x 100 NS or SS | £1100 |
| Standard S130 x 130 NS or SS | £1300 |
| Custom C110 x 170 NS or SS | £2000 |
The choice depends on available void depth and the blind strategy. You choose the S100 when space is tight. If you have more depth, the S130 gives you greater tolerance for fabric thickness, drop length and hem bar weight. If you want two blinds across your doors, such as night‑time privacy and daytime screens, you choose the larger C110 × 170 double‑height box.
At 2485mm, the height from the top of the doors to the top of an S100 box becomes 2585mm, assuming the mounting position aligns with the door head. This height allows ZoomTech Deflect Zero technology across the full width or standard roller blinds spanning each door or pairs of doors in privacy or 3 percent screen fabrics. More height or thicker fabrics can make the S100 Blindsapce Box borderline, so confirming fabric choice early is essential or opt for the larger S130 box.
Homeowner Perspective: The Difference Blindspace Makes
James’s full success story
Build Stage – Designing Blindspace
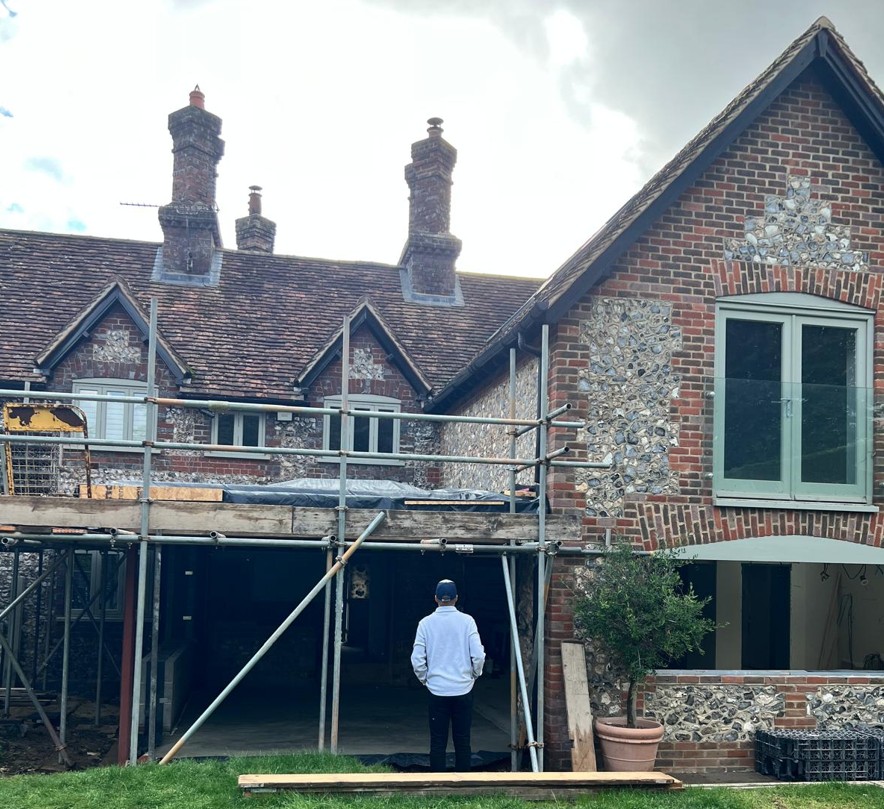
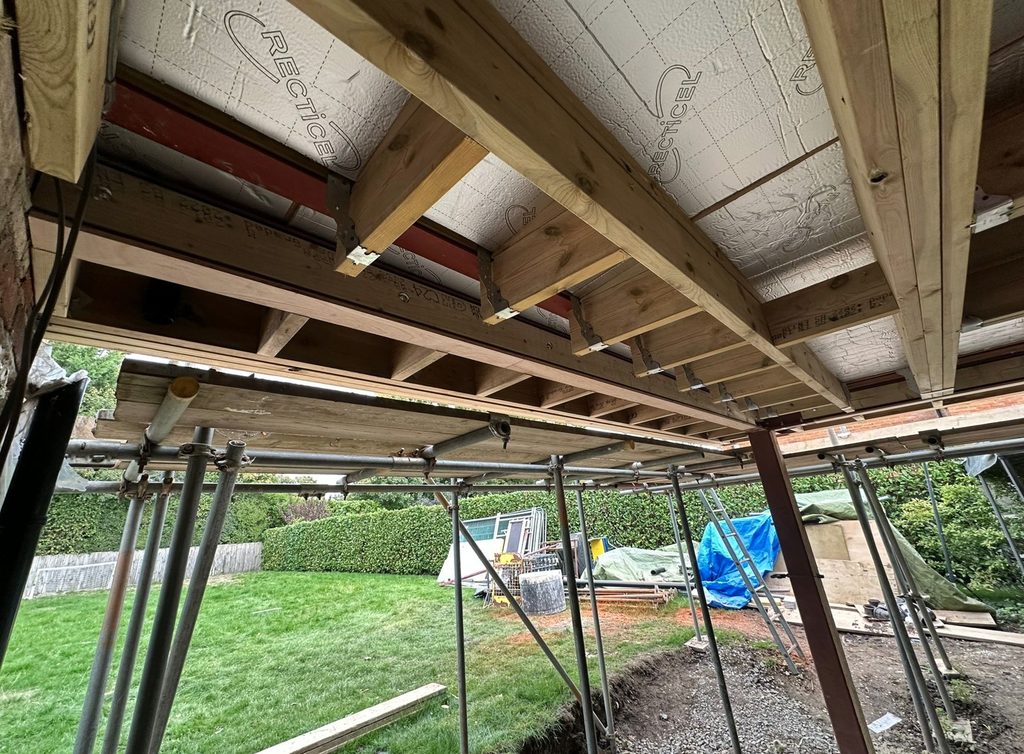
Post Build Stage – Living With Blindspace
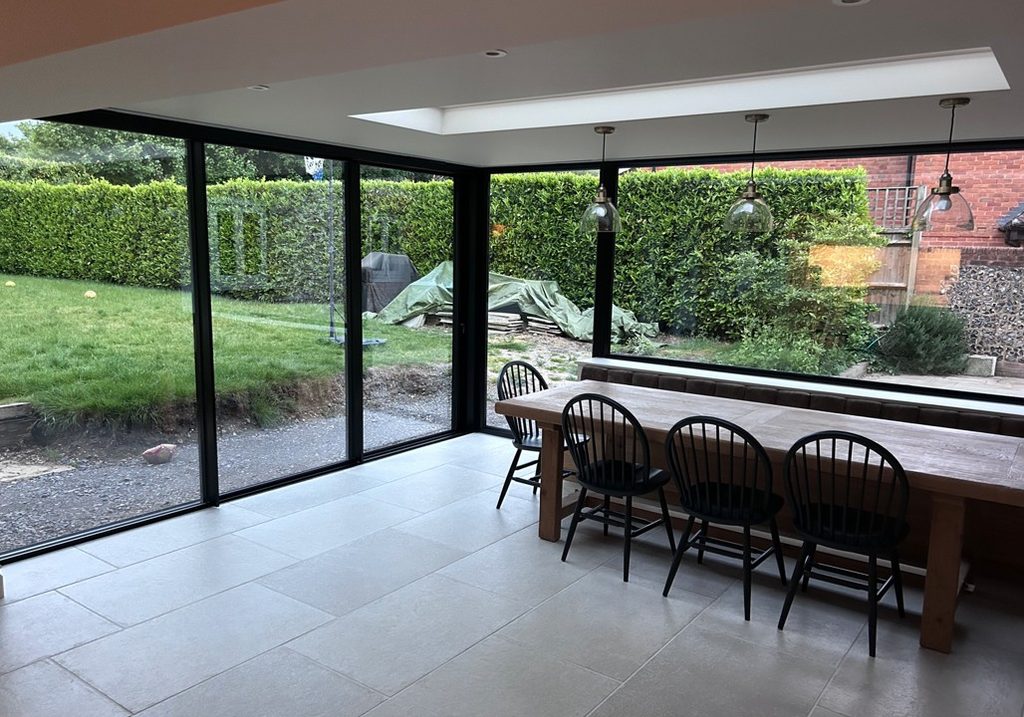
Next Steps
Whatever stage of the build you are at, the next step is always a conversation. If you are a homeowner or an architect and you want to deliver a beautiful space with fully concealed blinds, the smartest move is to explore what can be done. Concealment becomes predictable when the right solutions are discussed early and the structure is prepared correctly.
A call back can be scheduled using the diary below so we can review your project, confirm the Blindspace requirements and identify the best way forward.
Supporting Links
Success Story: James ‘Hidden’ and ‘Hidden in Plain Sight’ Electric Blinds – WindowTreat
Success Story: James’ Concealed Blackout Blinds for a Luxury Garage Extension – WindowTreat
Electric Blinds After the Build: How to Still Get A Premium Finish – WindowTreat